Install HP Printer drivers in Ubuntu, Linux Mint, and elementary OS
HP Linux Imaging and Printing (HPLIP) is an HP-developed application for printing, scanning, and faxing with HP inkjet and laser based printers connected to Linux computers. The HPLIP includes print, scan and fax support for 2594 printer models, including Deskjet, Officejet, Photosmart, PSC (Print Scan Copy), Business Inkjet, LaserJet, Edgeline MFP, and LaserJet MFP.
Check if HPLIP is already installed
Most of recent Linux distros come preinstalled with a version of HPLIP, but it’s possible that you may not have latest one. It’s a good idea to first check if at all your PC already has the latest HPLIP installed or not.Launch ‘Terminal’ and enter the following command in it.
dpkg -l hplip
Uninstall HPLIP
If this version is not the latest, you can simply uninstall it and install the latest version as described below. Even if you proceed without uninstalling, the HPLIP installer will prompt you that there is already a version available and you can then choose to remove the old and install the latest package. This command will remove HPLIP from your PC.dpkg -r hplipBefore you start installing HPLIP, I suggest to confirm if your HP printer is compatible to this application. You can look up your exact HP model number compatibility at their official webpage.
Install HP Linux Imaging and Printing in Ubuntu, Linux Mint, and elementary OS
This guide will also serve as a reference for those who want to reinstall HP drivers due to corrupted programs and broken packages.STEP 1: Go to official HP sourceforge webpage and download the HPLIP installer package. It should look something like hplip-3.16.11.run. Version number may be different in your case.
STEP 2: Go to ‘Applications’ or ‘Menu’ and launch ‘Terminal’.
STEP 3: I’m assuming that the downloaded hplip-3.16.11.run installer is in ‘Downloads’ directory. Navigate into it using cd command:
cd Downloads
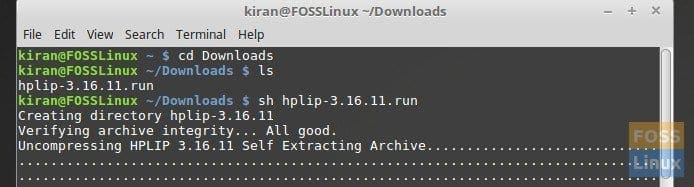
lsSTEP 5: Run the installer using sh command
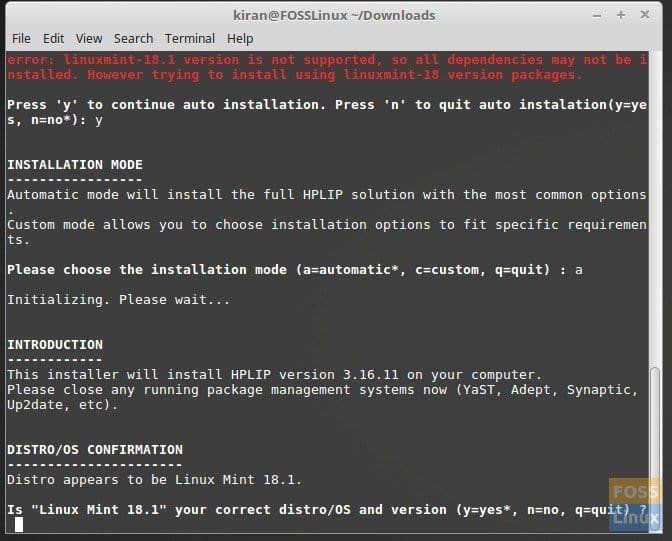
sh hplip-3.16.11.runSTEP 6: Pay attention to ‘Terminal’ progress. Type ‘y’ and hit enter for automatic installation prompt followed by ‘a’.
STEP 7: It will confirm your current Linux distro. Enter ‘y’ and hit enter.
STEP 9: Press enter to continue.
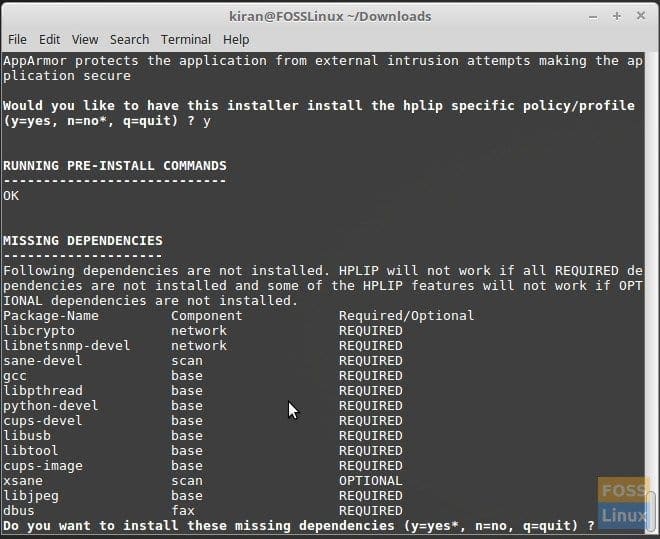
STEP 10: It will ask if would you like to have this installer install the hplip specific policy/profile. Type ‘y’ and continue.
STEP 11: In this step it will show you dependencies that are not installed. HPLIP will not work if all REQUIRED dependencies are not installed and some of the HPLIP features will not work if OPTIONAL dependencies are not installed. Go ahead and type ‘y’.
STEP 13: If your PC already has HPLIP installed, the installer will prompt you whether to remove and install or quit installation. If you are upgrading HPLIP or reinstalling HPLIP, you should continue to remove and install.
STEP 14: The installer will automatically compile the package for you and run the commands ‘./configure’ and ‘make’. You don’t need to do anything.
STEP 15: Enter ‘y’ when it prompts to keep HPLIP updated.
STEP 16: Printer drivers and imaging application should be complete by this stage. From next step onward, it’s more of connecting your computer to printer and get things working. Quitting any of below steps won’t break drivers and applications that are already installed.
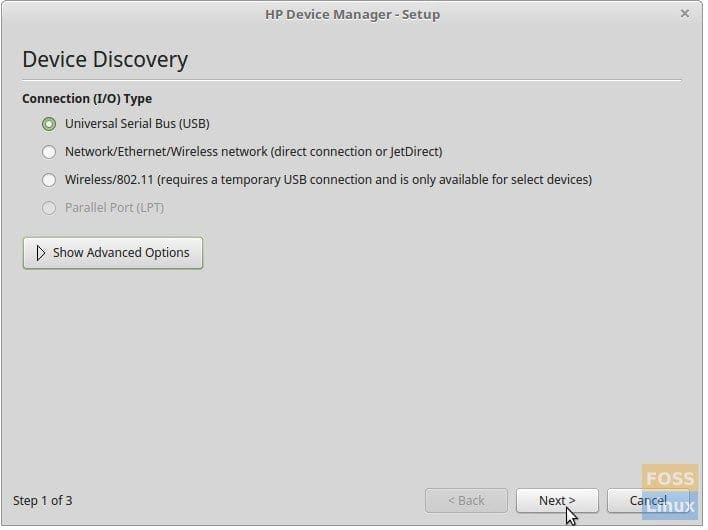
STEP 15: Your HP printer must now be connected to your PC and switched ON to continue from here in GUI mode. Enter ‘u’ and continue in GUI mode.
STEP 16: Select Printer connection type.
STEP 18: Select the PPD file (or driver) to be used for your Printer. The PPD files which are nothing but drivers which are most similar to your printer are displayed. Select the appropriate PPD file for your printer.
STEP 19: Confirm the Printer Settings and finish the configuration process.
STEP 20: Click ‘AddPrinter’ to complete the printer setup process.
This application is released by HP as free and open source software (FOSS). You won’t get a official support, but informal support is open in their launchpad website just in case if you happened to have any questions.
SOURCE / SUMBER