Subscribe:

Labels


Showing posts with label LINUX. Show all posts

Friday, April 13, 2018

Cara Install phpMyAdmin di Ubuntu 16.04

Pendahuluan

Pada dasarnya, mengelola database dengan MySQL harus dilakukan dengan cara mengetikkan perintah yang sesuai untuk setiap tujuan tertentu. Kita harus hafal bagaimana jika ingin menghapus, membuat atau pun mengubah record , namun dengan phpmyadmin, kita bisa mengelola database dengan mudah Karena berbasis web, sekali klik, semua perintah dapat dijalan kan tanpa mengetik command line.

Persyaratan

  1. Client SSH seperti Bitvise atau Putty
  2. Pengetahuan dasar tentang peritah Linux/Unix
  3. Server atau VPS dengan RAM minimal 256MB (openVZ), disarankan 512 MB jika Anda menggunakan KVM atau Xen
  4. Ubuntu 16.04, 32 bit atau 64 bit

Instal PHPMYADMIN

  1. Pertama dan yang paling penting, anda harus sudah menginstal php7, MariaDB dan web server (apache/nginx)
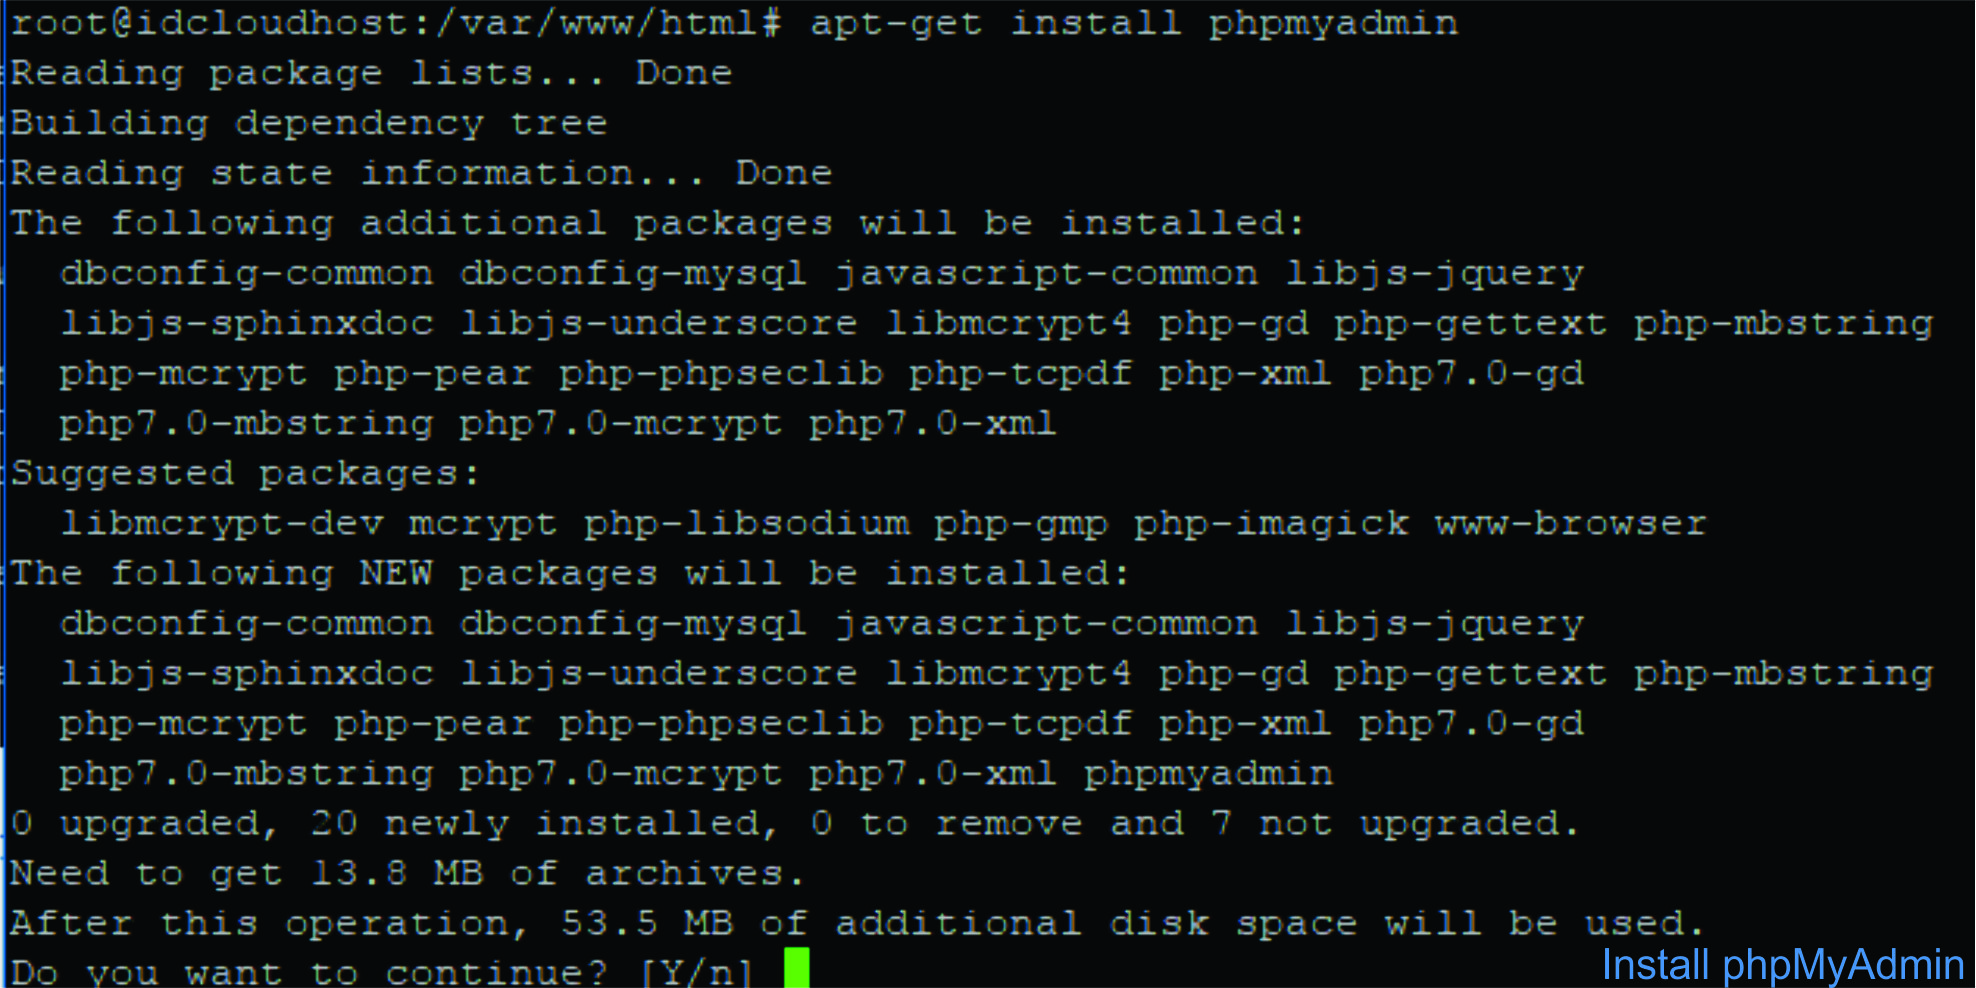
  2. Sekarang install phpMyAdmin dengan mengetikkan perintah berikut
    apt-get install phpmyadmin
    Cara Install phpMyAdmin di Ubuntu 16.04 LAMP
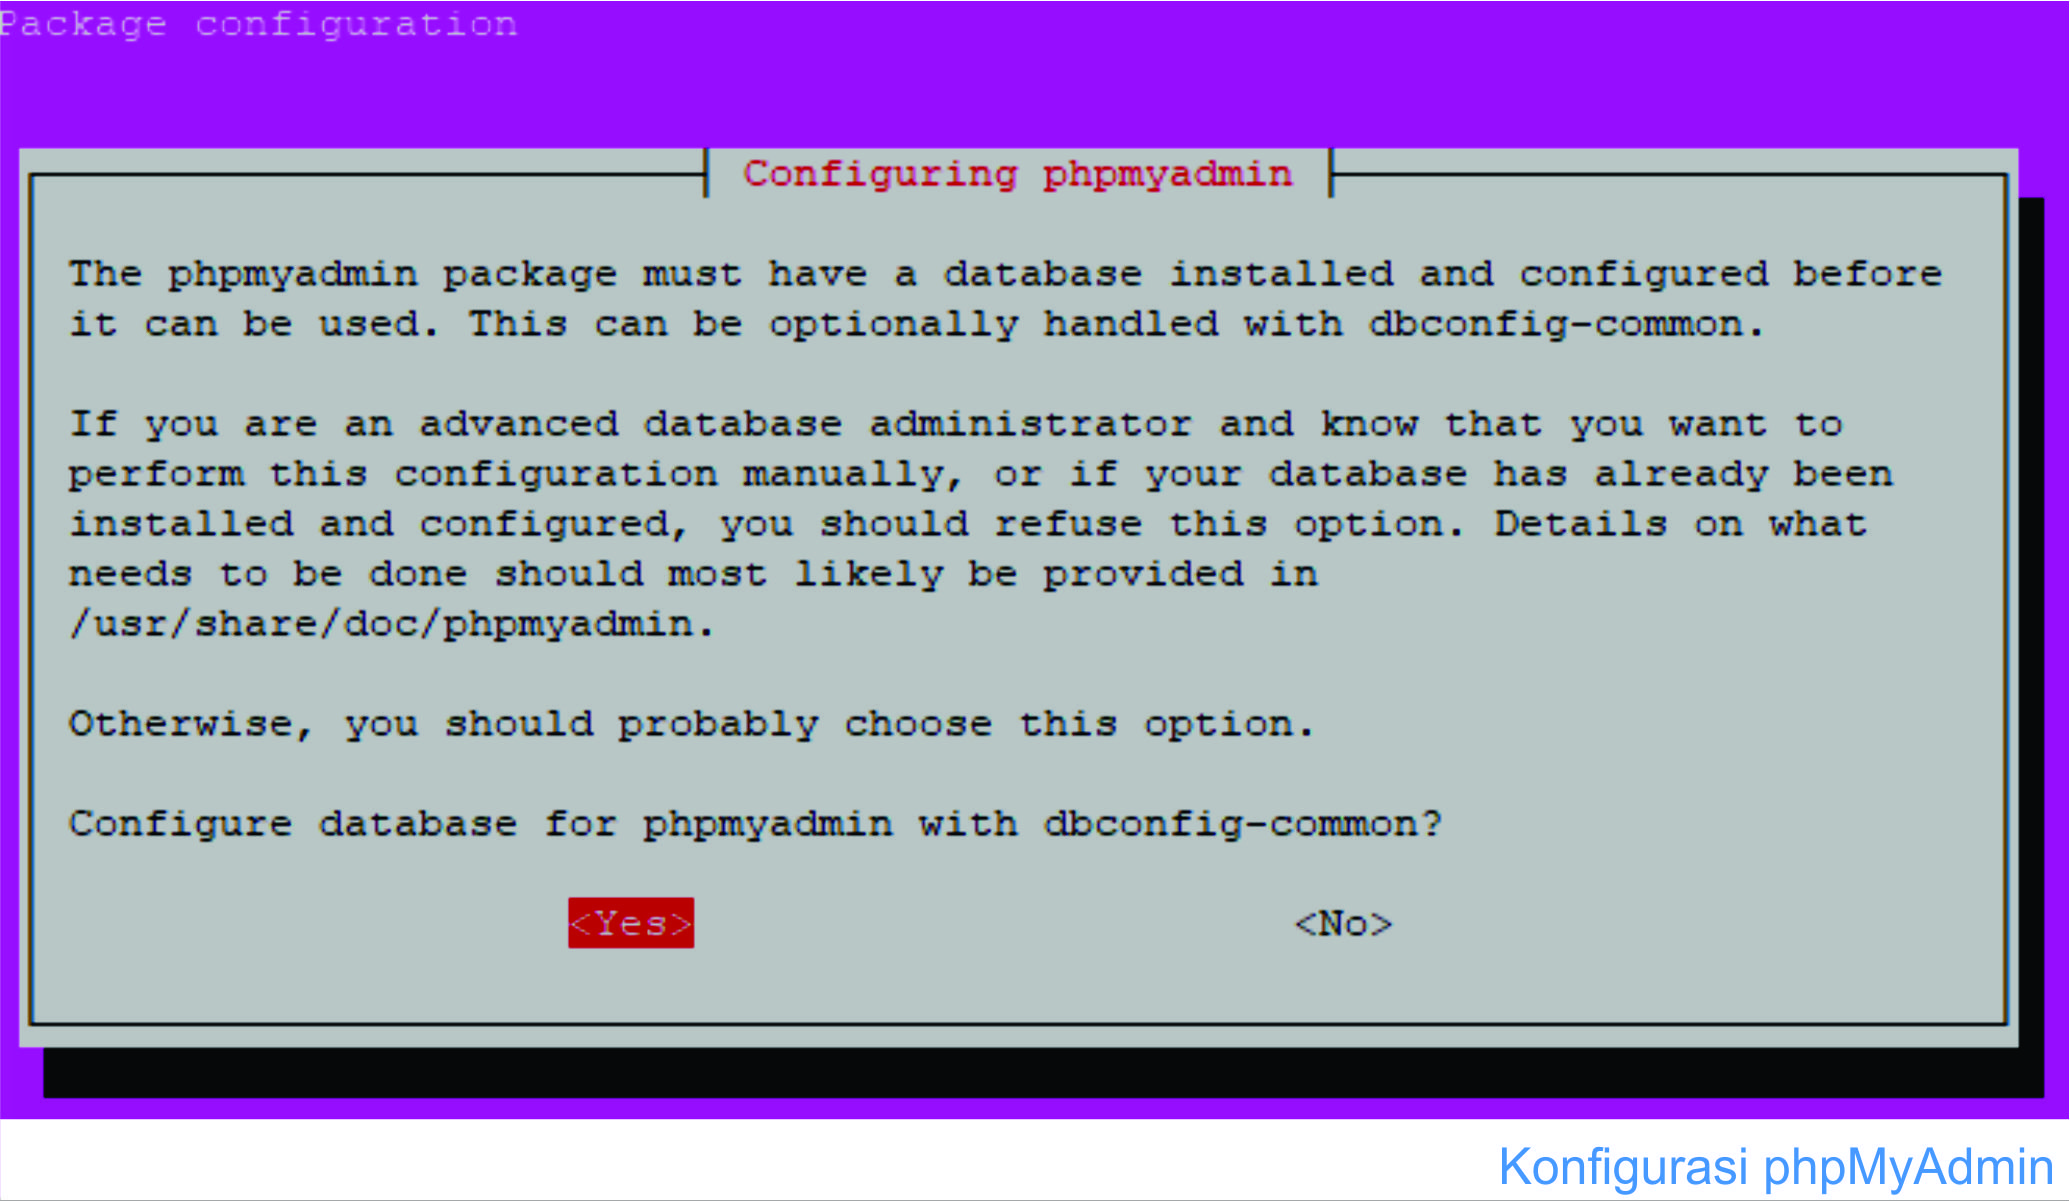
  3. Installer akan menanyakan opsi untuk menggunakan dbconfig-common untuk mengkonfigurasi phpMyAdmin. Pilih Yes.
    Cara Install phpMyAdmin di Ubuntu 16.04 LAMP
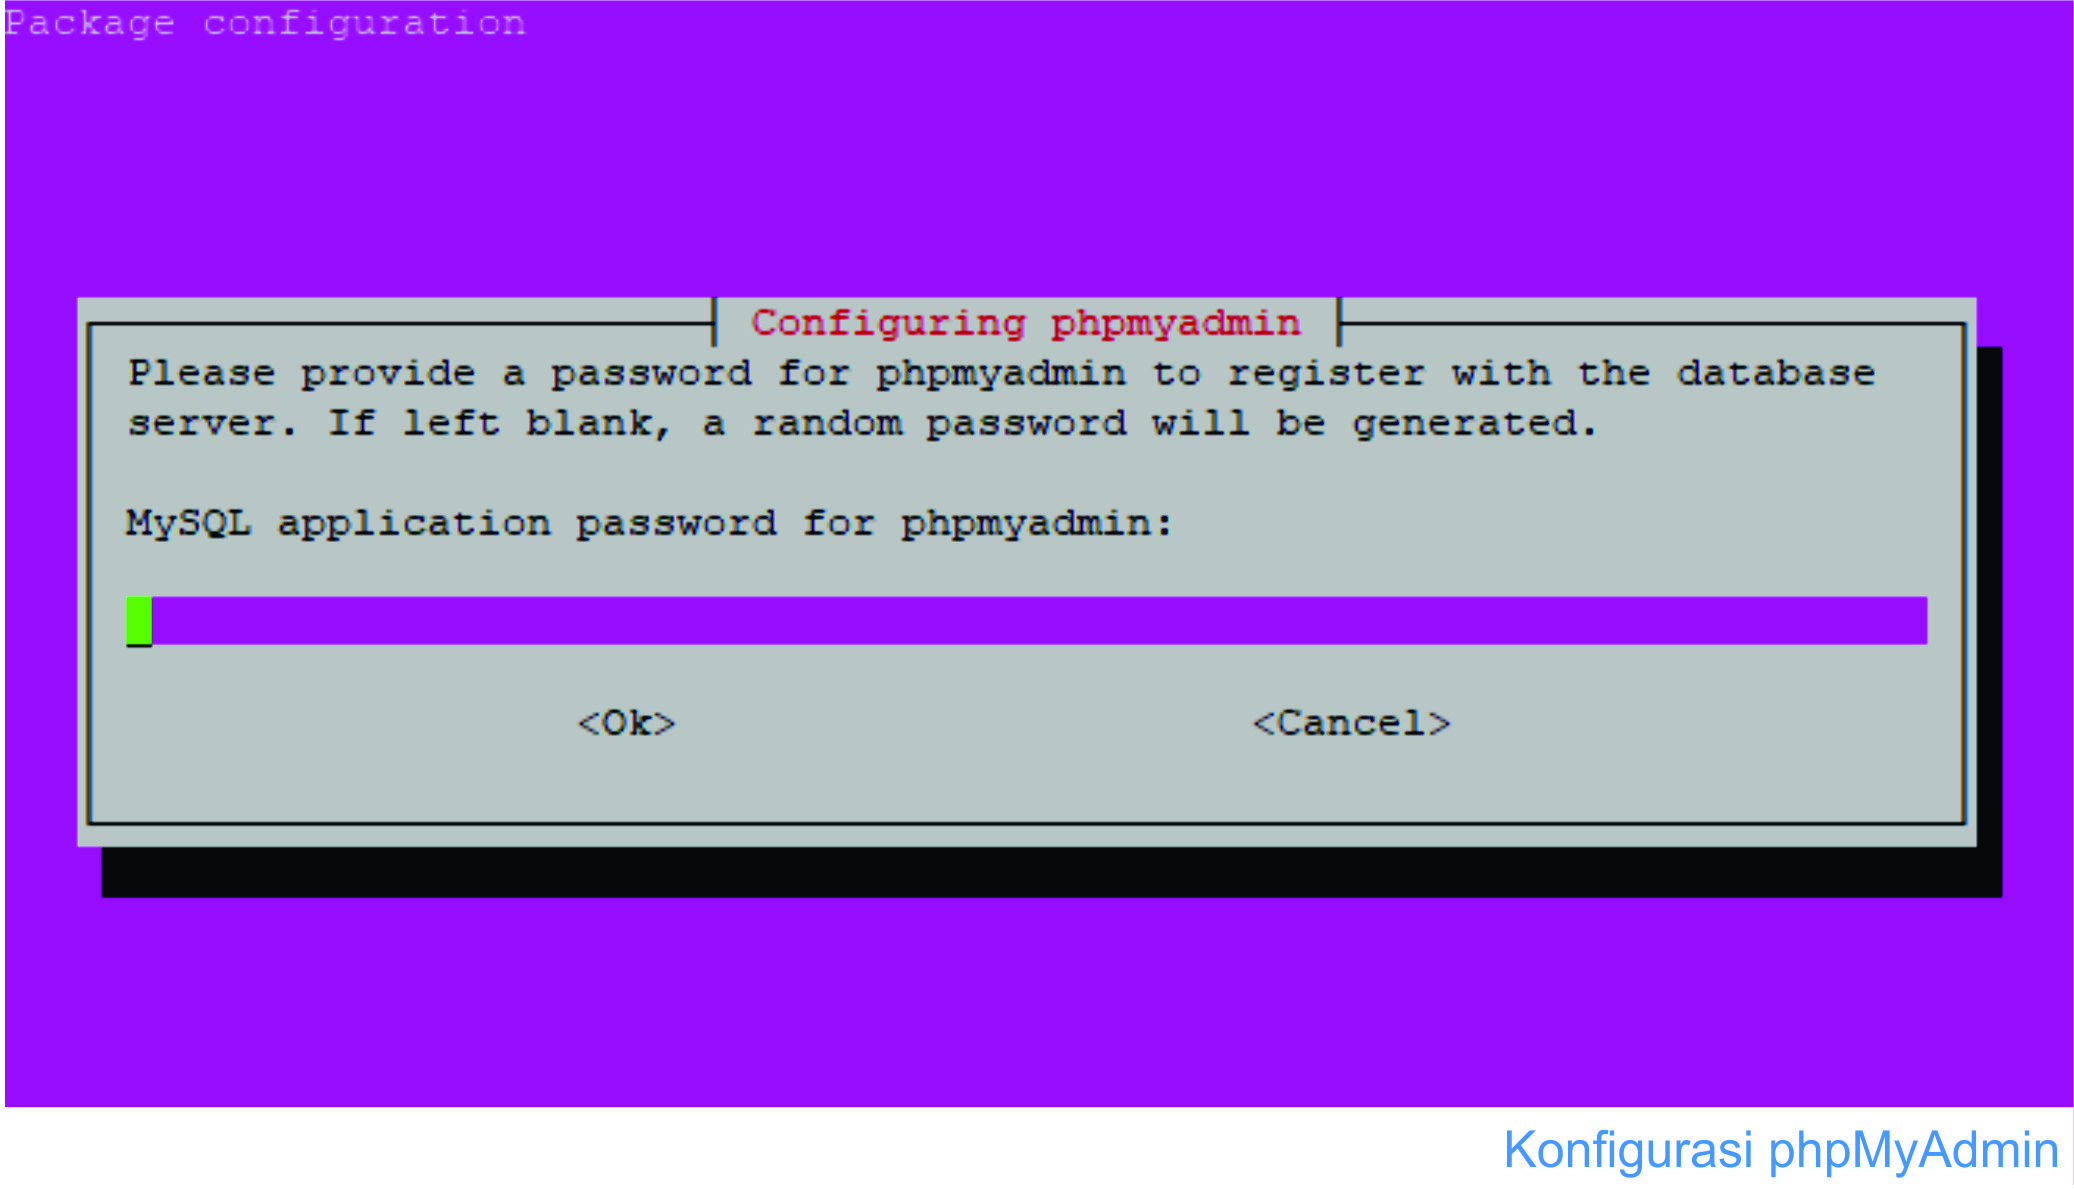
  4. Sekarang anda harus memasukkan password untuk database anda
    Cara Install phpMyAdmin di Ubuntu 16.04 LAMP
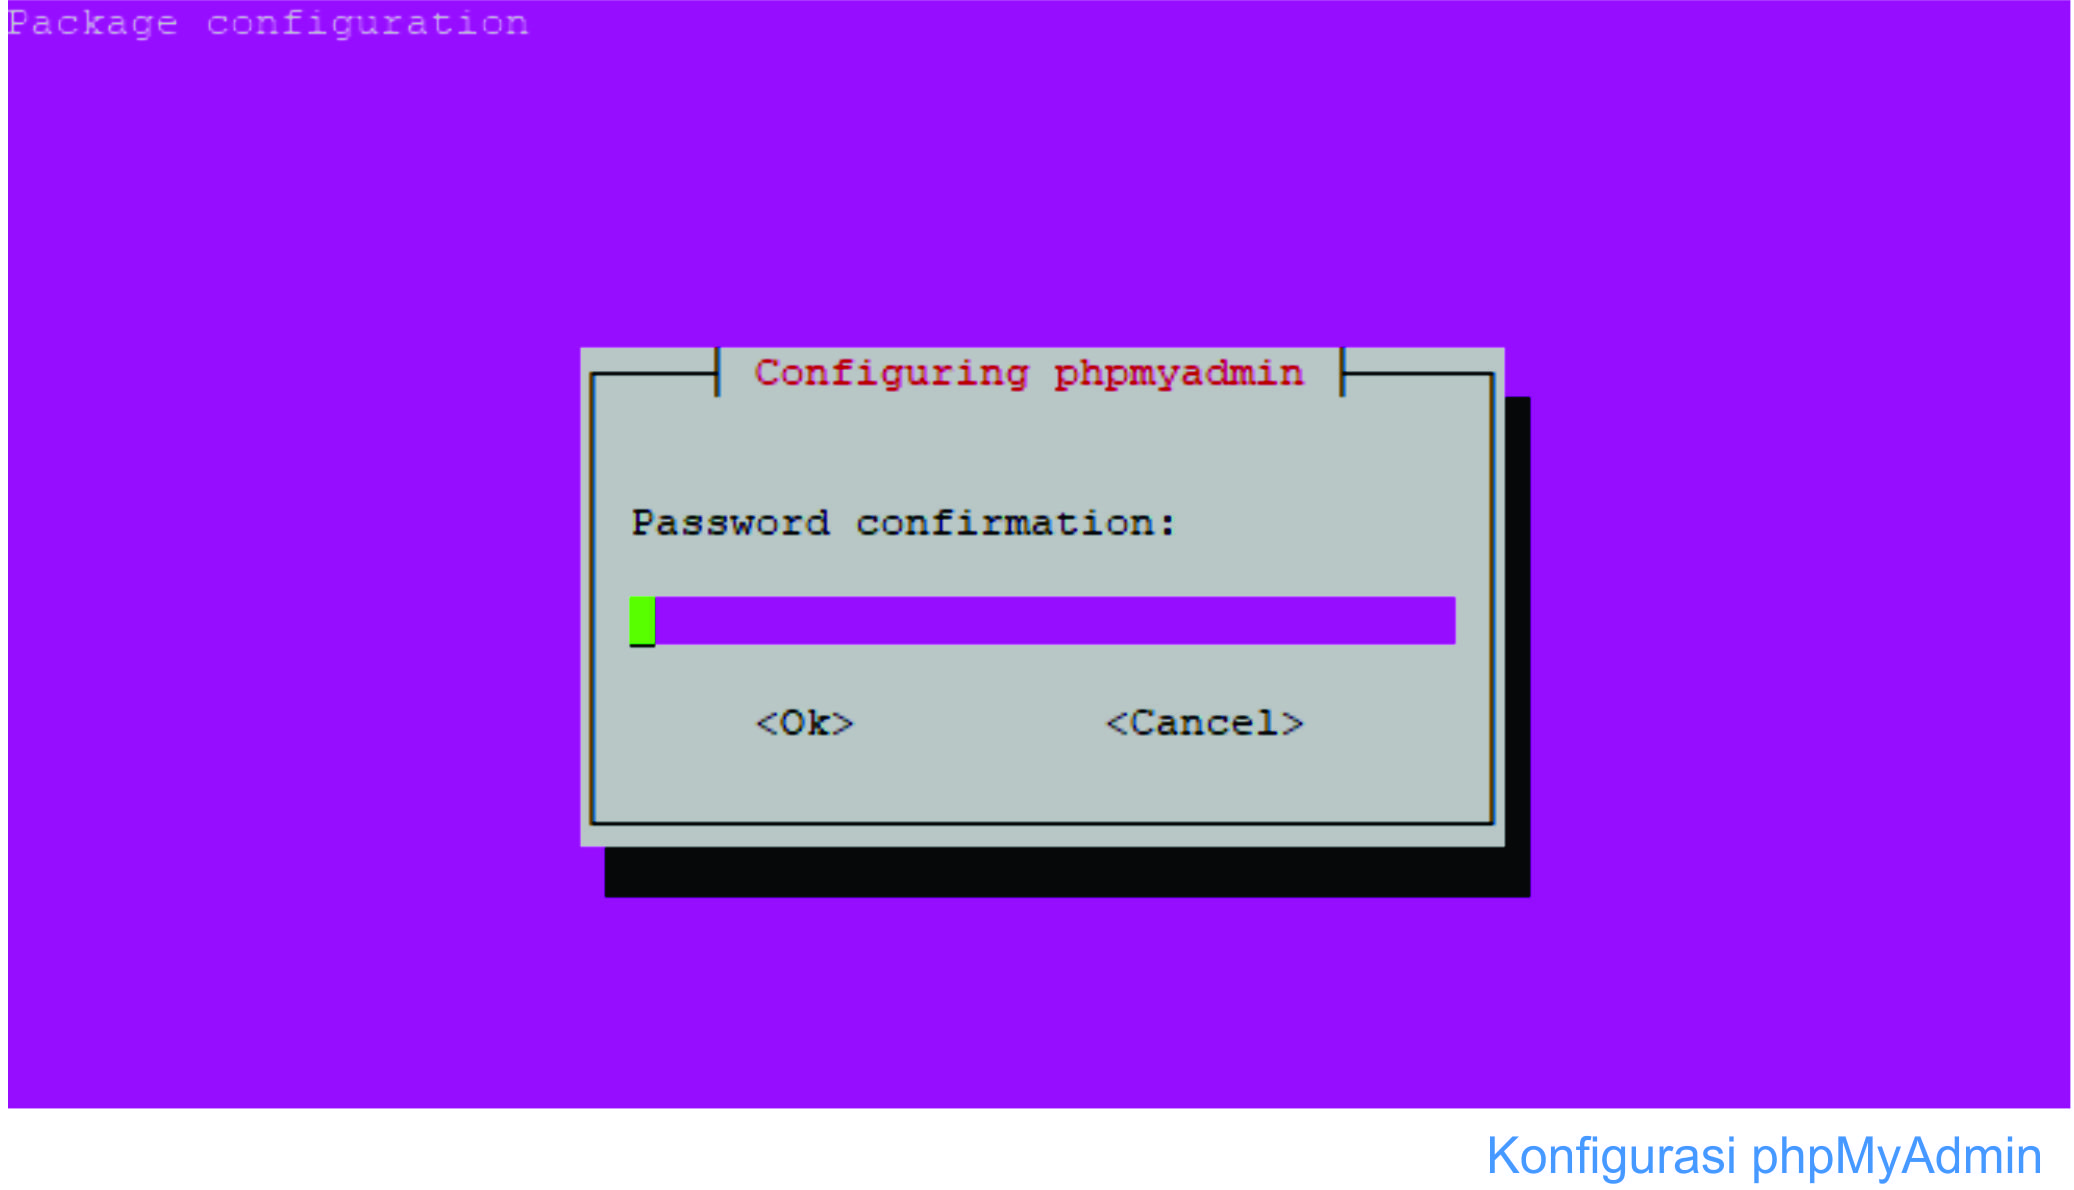
    Anda akan diminta mengkonfirmasi sekali lagi.
    Cara Install phpMyAdmin di Ubuntu 16.04 LAMP
  5. Setelah selesai, phpMyAdmin semestinya sudah terinstal, namun di beberapa kasus anda mungkin akan menemui pesan error yang berbunyi
    ERROR 1045 (28000) : Access denied for user ‘root’@’localhost’ (using password : NO). Your options are … (etc)
    Jika itu terjadi, ikuti langkah tambahan ini
    Pertama, pilih ‘abort’
    Kemudian login sebagai root menggunakan password anda ketika menginstal MariaDB
    mysql -u root -p
    Kemudian jalankan perintah ini
    CREATE DATABASE phpmyadmin;
    GRANT ALL ON phpmyadmin.* TO phpmyadmin@localhost IDENTIFIED BY ‘changethispassword’;
    \q
    Jangan lupa untuk mengganti changethispassword dengan password anda
    Selanjutnya, ubah konfigurasi database
    nano /etc/phpmyadmin/config-db.php
    Kemudian ubah parameter dbpass dengan password anda
    ##
    ## database access settings in php format
    ## automatically generated from /etc/dbconfig-common/phpmyadmin.conf
    ## by /usr/sbin/dbconfig-generate-include
    ##
    ## by default this file is managed via ucf, so you shouldn’t have to
    ## worry about manual changes being silently discarded. *however*,
    ## you’ll probably also want to edit the configuration file mentioned
    ## above too.
    ##
    $dbuser=’phpmyadmin’;
    $dbpass=’changethispassword’;
    $basepath=”;
    $dbname=’phpmyadmin’;
    $dbserver=’localhost’;
    $dbport=”;
    $dbtype=’mysql’;
    Ganti changethispassword dengan milik anda
    Kemudian simpan dengan menekan tombol Ctrl+O lalu Ctrl+X untuk keluar dari nano editor
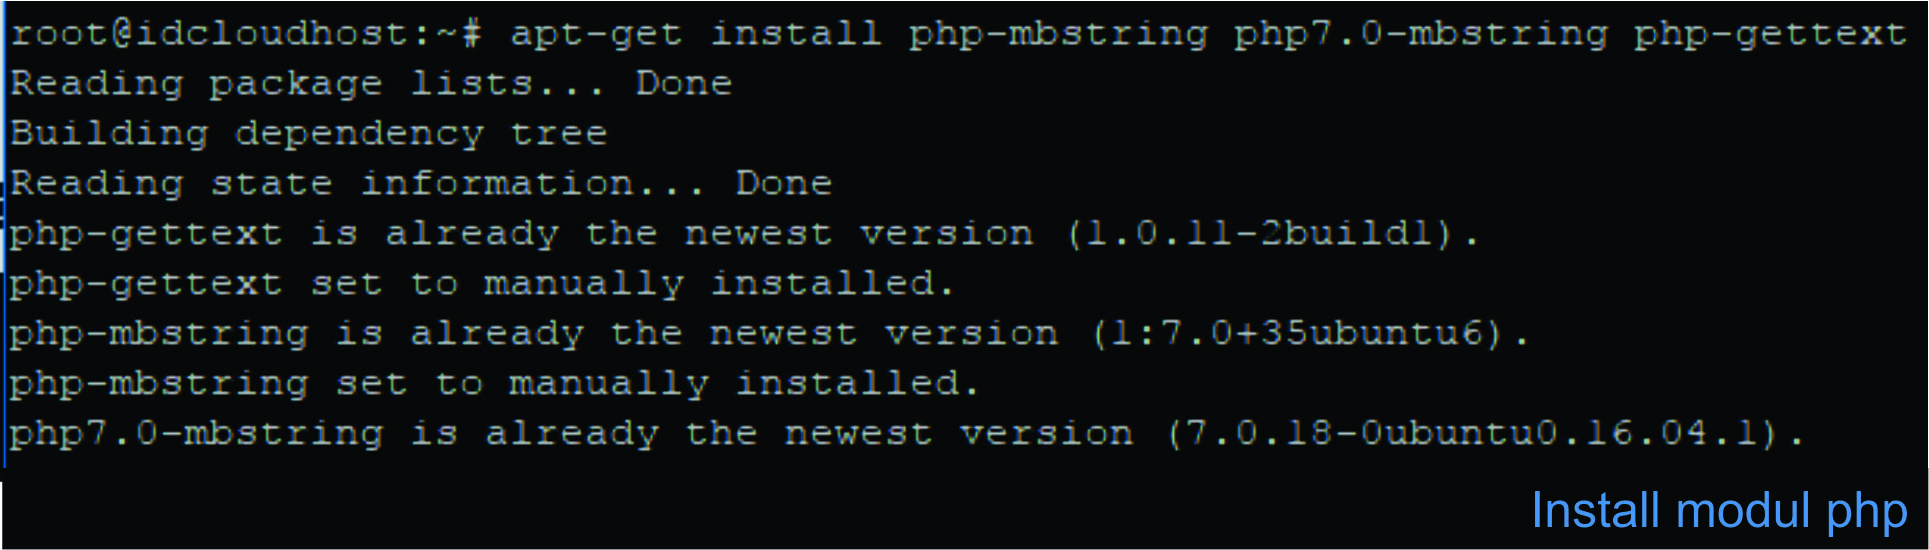
  6. Instal modul php yang dibutuhkan Karena tanpa itu phpmyadmin tidak akan bekerja
    Maka dari itu, masukkan perintah berikut
    apt-get install php-mbstring php7.0-mbstring php-gettext
    Cara Install phpMyAdmin di Ubuntu 16.04 LAMP
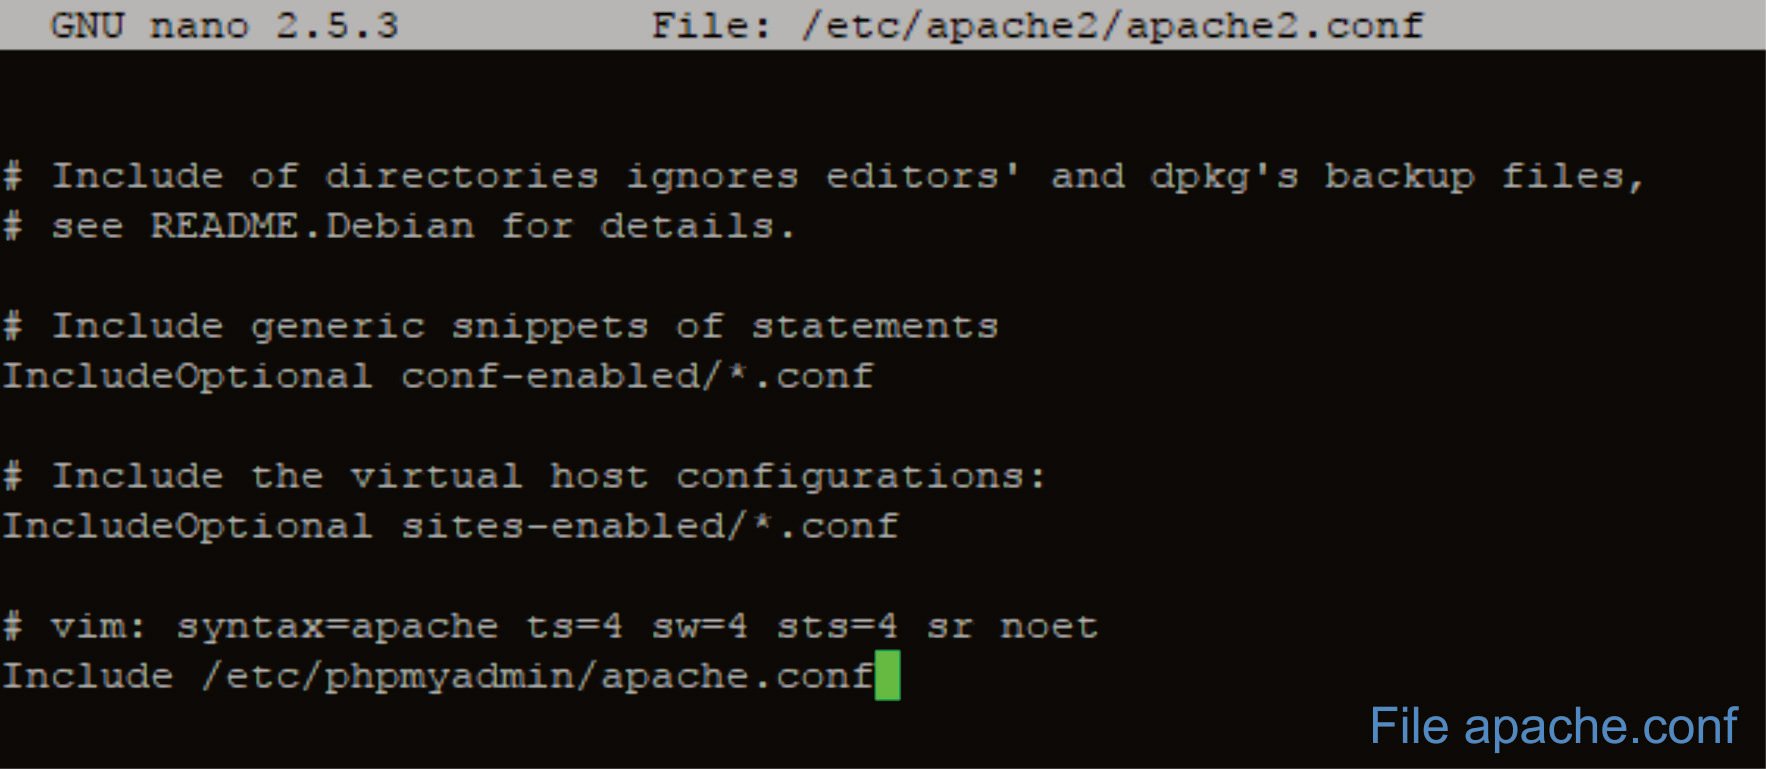
  7. Sesuaikan file config apache2 agar phpmyadmin dapat di akses
    nano /etc/apache2/apache2.conf
  8. Scroll file konfigurasi hingga ke dasar dan tambahkan kode berikut
    Include /etc/phpmyadmin/apache.conf
    Simpan perubahan dan keluar dari nano editor
    Cara Install phpMyAdmin di Ubuntu 16.04 LAMP
  9. Restart service apache2
    service apache2 restart
  10. Untuk mengeceknya, buka web browser dan coba akses phpmyadmin lewat URL
    http://x.x.x.x/phpmyadmin
    ganti x.x.x.x dengan IP address server anda
    Cara Install phpMyAdmin di Ubuntu 16.04 LAMP
    Gunakan credential berikut untuk login pertama
    • Username : root
    • Password : password yang dimasukkan ketika instalasi sebelumnya

    SUMBER / SOURCE

Installing Percona Server on Debian and Ubuntu

Installing Percona Server on Debian and Ubuntu

Ready-to-use packages are available from the Percona Server software repositories and the download page.
Supported Releases:
  • Debian:
  • 7.0 (wheezy)
  • 8.0 (jessie)
  • 9.0 (stretch)
  • Ubuntu:
  • 14.04LTS (trusty)
  • 16.04LTS (xenial)
  • 17.04 (zesty)
  • 17.10 (artful)
Supported Platforms:
  • x86
  • x86_64 (also known as amd64)

What’s in each DEB package?

The percona-server-server-5.7 package contains the database server itself, the mysqld binary and associated files.
The percona-server-common-5.7 package contains files common to the server and client.
The percona-server-client-5.7 package contains the command line client.
The percona-server-5.7-dbg package contains debug symbols for the server.
The percona-server-test-5.7 package contains the database test suite.
The percona-server-source-5.7 package contains the server source.
The libperconaserverclient20-dev package contains header files needed to compile software to use the client library.
The libperconaserverclient20 package contains the client shared library. The 18.1 is a reference to the version of the shared library. The version is incremented when there is a ABI change that requires software using the client library to be recompiled or its source code modified.

Installing Percona Server from Percona apt repository

  1. Fetch the repository packages from Percona web:
    wget https://repo.percona.com/apt/percona-release_0.1-4.$(lsb_release -sc)_all.deb
    
  2. Install the downloaded package with dpkg. To do that, run the following commands as root or with sudo:
    dpkg -i percona-release_0.1-4.$(lsb_release -sc)_all.deb
    
    Once you install this package the Percona repositories should be added. You can check the repository setup in the /etc/apt/sources.list.d/percona-release.list file.
  3. Remember to update the local cache:
    $ sudo apt-get update
    
  4. After that you can install the server package:
    $ sudo apt-get install percona-server-server-5.7
    
Note
Percona Server 5.7 comes with the TokuDB storage engine. You can find more information on how to install and enable the TokuDB storage in the TokuDB Installation guide.

Percona apt Testing repository

Percona offers pre-release builds from the testing repository. To enable it add the just uncomment the testing repository lines in the Percona repository definition in your repository file (default /etc/apt/sources.list.d/percona-release.list). It should looks like this (in this example VERSION is the name of your distribution):
# Testing & pre-release packages
#
deb http://repo.percona.com/apt VERSION testing
deb-src http://repo.percona.com/apt VERSION testing

Apt-Pinning the packages

In some cases you might need to “pin” the selected packages to avoid the upgrades from the distribution repositories. You’ll need to make a new file /etc/apt/preferences.d/00percona.pref and add the following lines in it:
Package: *
Pin: release o=Percona Development Team
Pin-Priority: 1001
For more information about the pinning you can check the official debian wiki.

Installing Percona Server using downloaded deb packages

Download the packages of the desired series for your architecture from the download page. The easiest way is to download bundle which contains all the packages. Following example will download Percona Server 5.7.10-3 release packages for Debian 8.0:
You should then unpack the bundle to get the packages:
$ tar xvf Percona-Server-5.7.10-3-r63dafaf-jessie-x86_64-bundle.tar
After you unpack the bundle you should see the following packages:
$ ls *.deb
libperconaserverclient20-dev_5.7.10-3-1.jessie_amd64.deb
libperconaserverclient20_5.7.10-3-1.jessie_amd64.deb
percona-server-5.7-dbg_5.7.10-3-1.jessie_amd64.deb
percona-server-client-5.7_5.7.10-3-1.jessie_amd64.deb
percona-server-common-5.7_5.7.10-3-1.jessie_amd64.deb
percona-server-server-5.7_5.7.10-3-1.jessie_amd64.deb
percona-server-source-5.7_5.7.10-3-1.jessie_amd64.deb
percona-server-test-5.7_5.7.10-3-1.jessie_amd64.deb
percona-server-tokudb-5.7_5.7.10-3-1.jessie_amd64.deb
Now you can install Percona Server by running:
$ sudo dpkg -i *.deb
This will install all the packages from the bundle. Another option is to download/specify only the packages you need for running Percona Server installation (libperconaserverclient20_5.7.10-3-1.jessie_amd64.deb, percona-server-client-5.7_5.7.10-3-1.jessie_amd64.deb, percona-server-common-5.7_5.7.10-3-1.jessie_amd64.deb, and percona-server-server-5.7_5.7.10-3-1.jessie_amd64.deb. Optionally you can install percona-server-tokudb-5.7_5.7.10-3-1.jessie_amd64.deb if you want TokuDB storage engine).
Note
Percona Server 5.7 comes with the TokuDB storage engine. You can find more information on how to install and enable the TokuDB storage in the TokuDB Installation guide.
Warning
When installing packages manually like this, you’ll need to make sure to resolve all the dependencies and install missing packages yourself. Following packages will need to be installed before you can manually install Percona Server: mysql-common, libjemalloc1, libaio1 and libmecab2

Running Percona Server

Percona Server stores the data files in /var/lib/mysql/ by default. You can find the configuration file that is used to manage Percona Server in /etc/mysql/my.cnf.
Note
Debian and Ubuntu installation doesn’t automatically create a special debian-sys-maint user which can be used by the control scripts to control the Percona Server mysqld and mysqld_safe services like it was the case with previous Percona Server versions. If you still require this user you’ll need to create it manually.
  1. Starting the service
    Percona Server is started automatically after it gets installed unless it encounters errors during the installation process. You can also manually start it by running:
    $ sudo service mysql start
    
  2. Confirming that service is running
    You can check the service status by running:
    $ service mysql status
    
  3. Stopping the service
    You can stop the service by running:
    $ sudo service mysql stop
    
  4. Restarting the service
    You can restart the service by running:
    $ sudo service mysql restart
    
Note
Debian 8.0 (jessie) and Ubuntu 15.04 (vivid) come with systemd as the default system and service manager so you can invoke all the above commands with sytemctl instead of service. Currently both are supported.

Uninstalling Percona Server

To uninstall Percona Server you’ll need to remove all the installed packages. Removing packages with apt-get remove will leave the configuration and data files. Removing the packages with apt-get purge will remove all the packages with configuration files and data files (all the databases). Depending on your needs you can choose which command better suits you.
  1. Stop the Percona Server service
    $ sudo service mysql stop
    
  2. Remove the packages
    1. Remove the packages. This will leave the data files (databases, tables, logs, configuration, etc.) behind. In case you don’t need them you’ll need to remove them manually.
    $ sudo apt-get remove percona-server*
    
    1. Purge the packages. NOTE: This will remove all the packages and delete all the data files (databases, tables, logs, etc.)
    $ sudo apt-get purge percona-server*
    

SUMBER / SOURCE